Select tube or tubes appropriate for required specimen.
Remove the cover over the valve section of the needle.
Thread the needle into the holder. Be sure needle is firmly seated to ensure needle does not unthread during use.
Apply tourniquet (max. 1 minute) Prepare venipuncture site with an appropriate antiseptic.
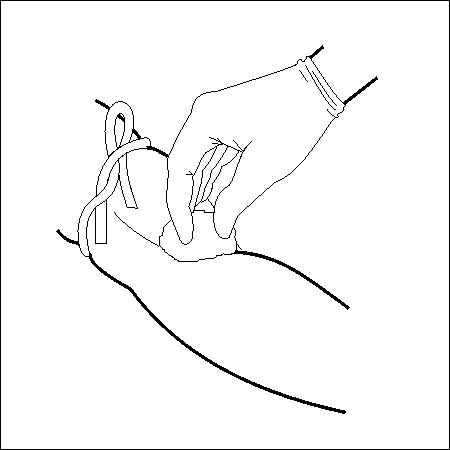
DO NOT PALPATE VENIPUNCTURE AREA AFTER CLEANSING.
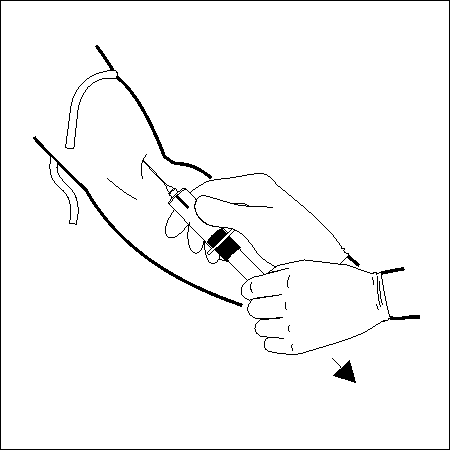
Place patient's arm in a downward position.
Remove needle shield. Perform venipuncture WITH ARM DOWNWARD AND TUBE CAP UPPERMOST.
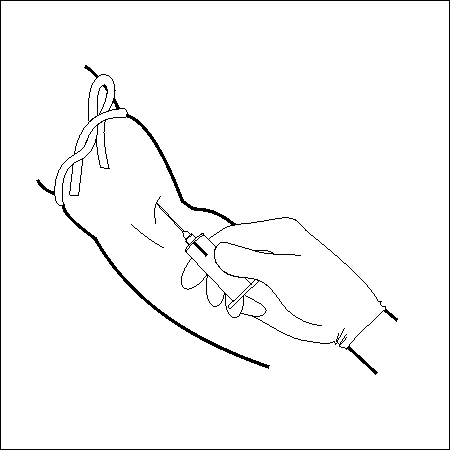
Push tube into the holder and onto the needle valve puncturing the rubber diaphragm. Center tubes in holder when penetrating the cap to prevent sidewall penetration and subsequent premature vacuum loss.
REMOVE TOURNIQUET AS SOON AS BLOOD APPEARS IN TUBE. DO NOT ALLOW CONTENTS OF TUBE TO CONTACT THE CAP OR END OF THE NEEDLE DURING PROCEDURE. Always hold in place by pressing the tube with the thumb to ensure complete vacuum draw.
NOTE: Blood may occasionally leak from the needle sleeve. Practice universal safety precautions to minimise hazard exposure.
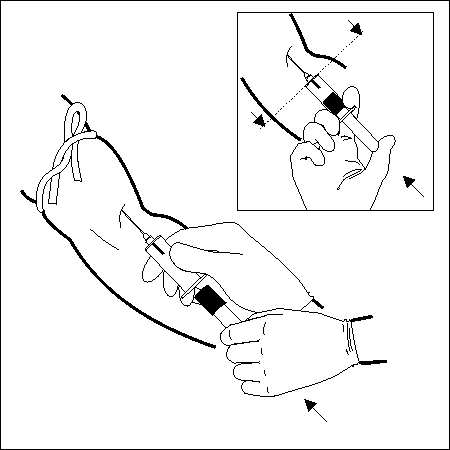
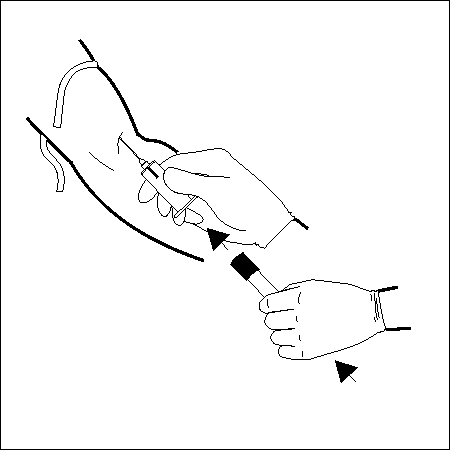
When the first tube is full and blood flow ceases, remove it from holder.
If no blood flows into tube or if blood flow ceases before an adequate specimen is collected, the following steps are suggested to complete satisfactory collection:
Iterate:
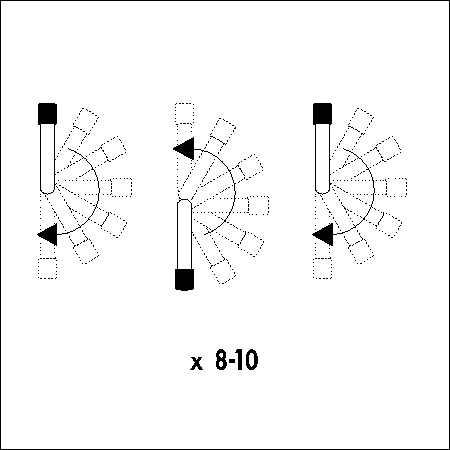
Do not shake. Vigorous mixing may cause foaming or hemolysis. Insufficient mixing or delayed mixing in serum tubes may result in delayed clotting. In tubes with anticoagulants, inadequate mixing may result in platelet clumping, clotting and/or incorrect test results.
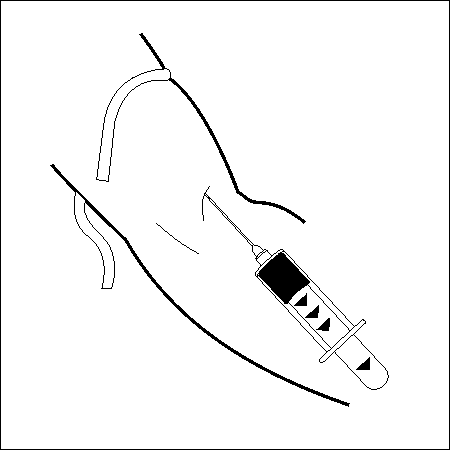
A soon as blood stops flowing in the last tube, remove needle from vein, applying pressure to puncture site with dry sterile swab until bleeding stops.
Once clotting has occurred, apply bandage if desired.
After venipuncture, the top of the cap may contain residual blood. Take proper precautions when handling tubes to avoid contact with this blood. Any needle holder that becomes contaminated with blood is considered hazardous and should be decontaminated with an appropriate disinfectant or disposed of immediately.
Dispose of the used needle using an appropriate disposal device. DO NOT RECAP. Recapping of needles increases the risk of needle stick injury and blood exposure.
It is the laboratory's ultimate responsibility to verify that a change from one tube to another does not significantly affect analytical results obtained from patient samples.
Ensure that tubes are properly seated in the centrifuge carrier; incomplete seating could result in the separation of the VACUTUBE Safety Stopper from the tube. VACUTUBE Serum Tubes should be centrifuged 30 minutes after blood collection (to ensure blood is clotted).
| Tube Type | Recommended relative centrifugal force (rcf) | Rec. time |
|---|---|---|
| VACUTUBE Serum Tubes | Minimum 1500 g | 10 min |
| VACUTUBE Serum Tubes with Separator Gel | 1800 g | 10 min |
| VACUTUBE Plasma Tubes | 2000 - 3000 g | 15 min |
| VACUTUBE Coagulation Tubes | ||
| Platelet tests (PRP) | 150 g | 5 min |
| Routine tests (PPP) | 1500 - 2000 g | 10 min |
| Preparation for deep freeze plasma (PFP) | 2500 - 3000 g | 20 min |
Tubes should not be recentrifuged once barrier has formed.
To prevent heating during centrifugation, set refrigerated centrifuges to 25°C.
Gel separation tubes should be centrifuged no later than 2 hours after collection.
Stopper safety: The stopper is designed to allow a controlled and safe opening of the test tube, preventing any aerosol formation on removal. Unscrewing is not necessary.
